

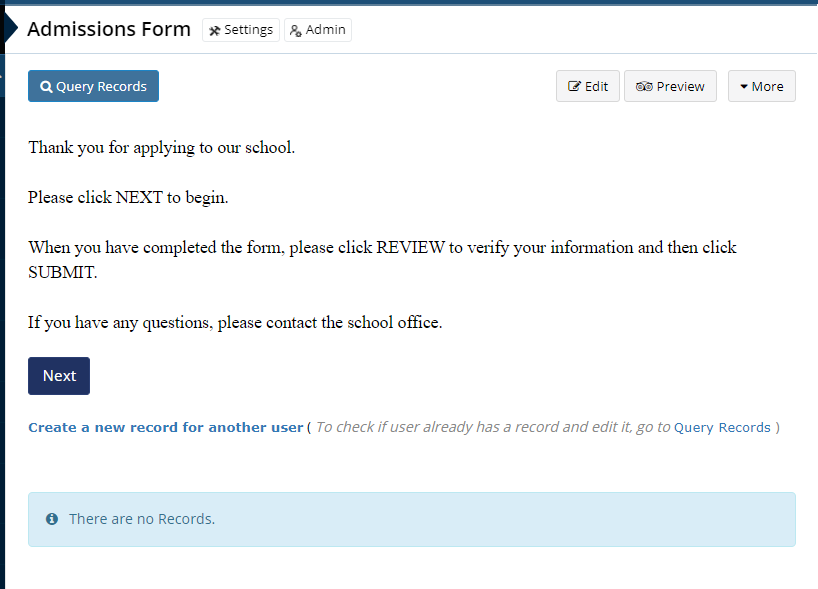
You can edit an existing form or create a new form by adding sections and fields to it.
One of the most powerful benefits when using SchoolSpeak’s forms is that you may easily add and modify sections and fields.
|
Notes: Before you start a form project, it is important to think through the form and the process of supporting that form. Take a moment and write down the information that you would like to collect from the member. Group that data into logical combinations so that when a member is entering data it seems to flow naturally. If payment is assessed, write down what determines what the fee will be. Look at your process, does your mock-up form have all of the necessary fields to support the process. A little preparation before you start will save you a lot of time in testing and editing. |
Important Terms
Sections – Often used to separate different parts of a form into logical groupings of fields. For example, contact information may be put into a section called Contact information.
Fields – Fields on a form are used to collect information from the member completing the form. SchoolSpeak provides a variety of different types of fields that are easy to add to your form. Here are some examples:
Each field has a list of properties that you can use to determine how the field will work within the form. For example, you may make a field mandatory or provide additional instructions on how to complete a field. Here are some of the most common fields:
- Name – Premade field that accepts member first, middle and last name
- Address – Premade field for street address, state, zip code
- Signature = Premade field for parent signature and date
- Text Field – Open field and may be used to enter an answer
- Drop-down – Field that may present options for user to choose
For a detailed list of the fields please see the Types of Form Fields.
Editing a premade form
Once the form is created you make can changes at any time.
|
Notes:
|
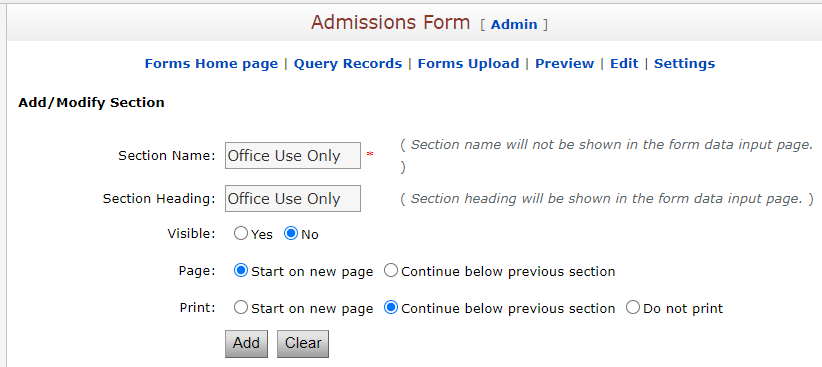
To add a new section
- Click Edit.
- Under Add/Modify Section, click Add/Edit Section

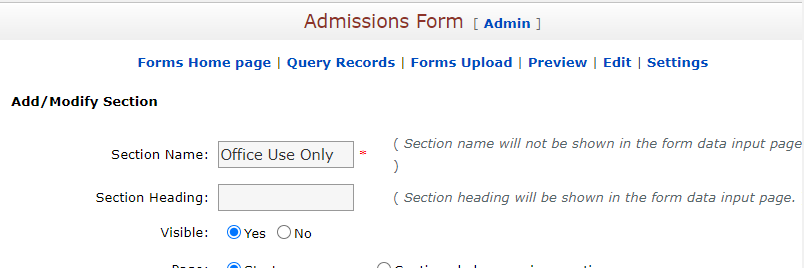
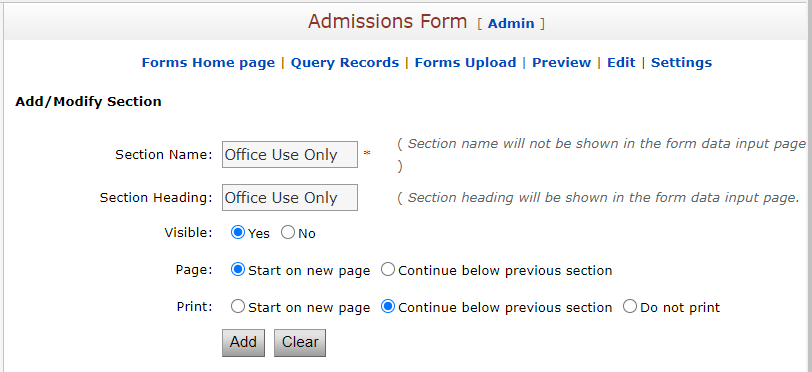
- Under Section Name, type the name of the section
- Under Section Heading, enter what the parent/member should see as the header of the form
- Select whether the section of the form should be Visible to the parents or not by selecting Yes or No. (In this Office Use Only example, it will not be visible to the parents, so it's set to No.)
- Under Page, select whether it will be a new page for parents to complete or if it will continue below the previous section.
- Under Print, select whether this section will print on a new page (Start on new page), Continue Below Previous Section, or Do Not Print
- Click Add
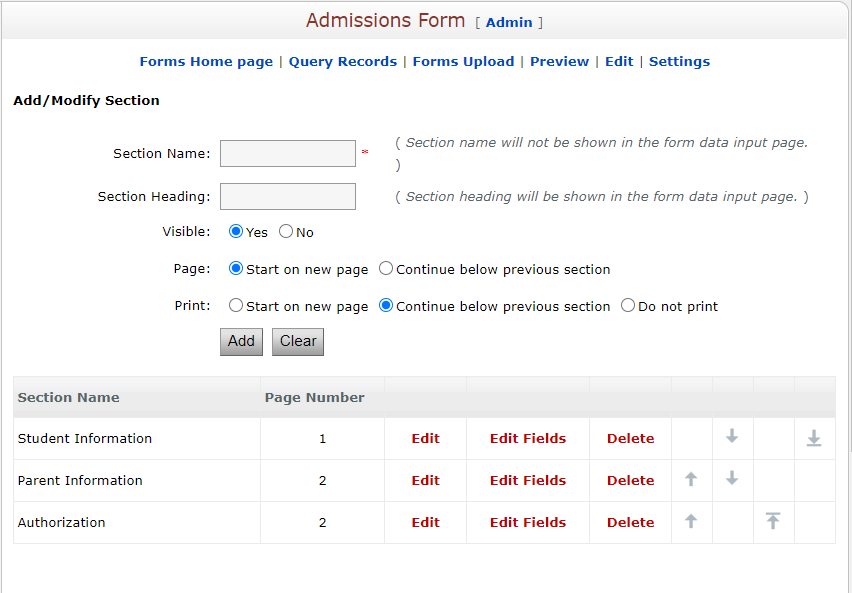
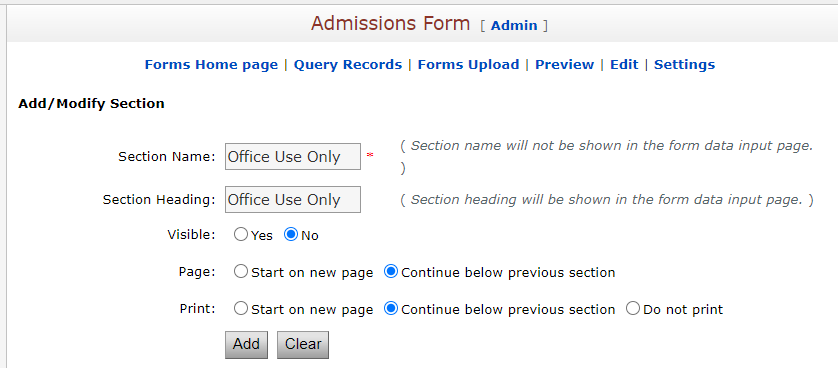
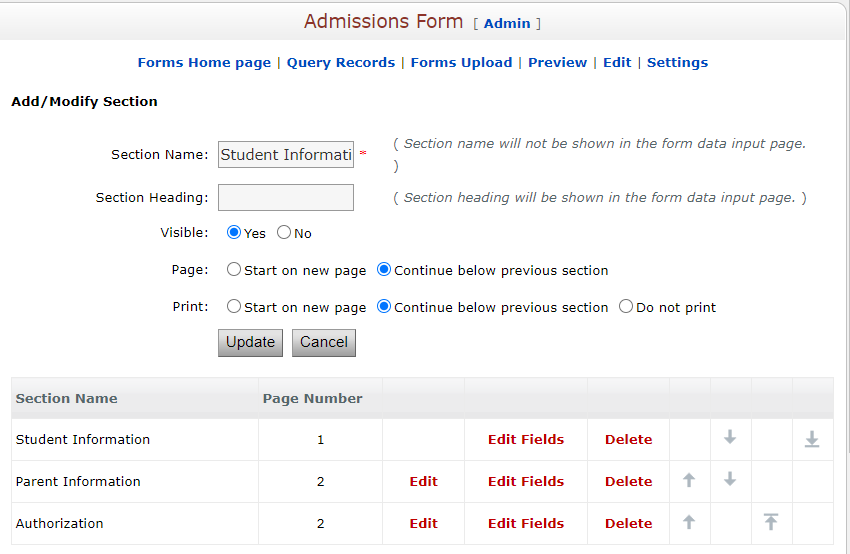
To modify a currently existing section
- Click Edit.
- Under Add/Modify Section, click Add/Edit Section
- Click Edit next to the section you are trying to edit
- Make changes as needed
- Click Update
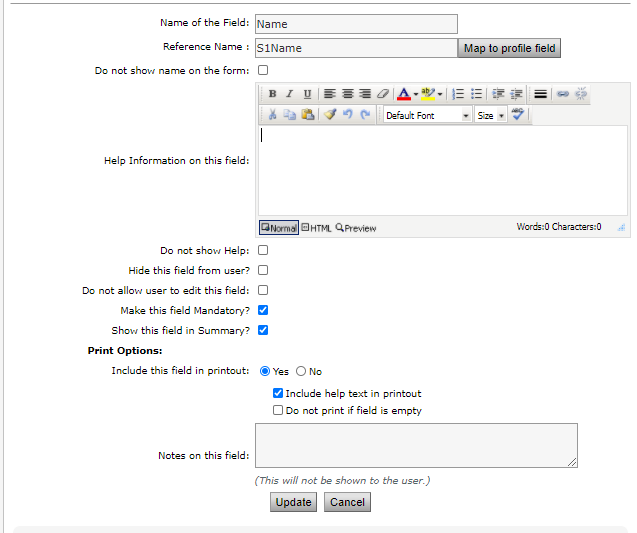
To add a new field to a section
- Locate the section of the form that you would like to add a new field either by using the Add/Edit section drop-down or go to the form and click Edit field link within the form.
- Click on the appropriate field type that you would like to add in the Select Field to add drop- down.

- Locate Form Field name – Enter the name or label of the field that you would like to show on the form
- Locate Reference Name Field – Indicate the name of the field – this is used internally by the form.
A standard syntax suggestion is Section name – Field name. - Customize the field as necessary – choose the field characteristics that are appropriate or indicate the values for lists and drop-down fields.
- Click Add/Update.
When you have added all of the fields that are required, click on Previewto view the form display. To further test, begin to answer the form so that you can see how the fields work. You may also want to add a fake parent to SchoolSpeak so that you can see how it will really work.